How to write high quality content for affiliate marketing

How to write high quality content for affiliate marketing

Writing high-quality content for affiliate marketing is essential to engage your audience, build trust, and drive conversions. Here’s a guide on how to create top-notch content:

  • Know Your Audience: Understand your target audience’s needs, preferences, and pain points. Your content should directly address their concerns and offer solutions.
  • Provide Value: Focus on delivering valuable information that educates, informs, or entertains your audience. Your content should genuinely help them make informed decisions.
  • Be Transparent and Authentic: Clearly disclose your affiliate relationship to your audience. Authenticity builds trust, and readers are more likely to trust recommendations from someone who is transparent about their affiliations.
  • Understand the Product: Thoroughly research the product you’re promoting. Understand its features, benefits, and limitations. Your content should accurately represent the product to avoid misleading your audience.
  • Solve Problems: Show how the affiliate product can address your audience’s problems or fulfill their needs. Explain how the product can improve their lives or make things easier for them.
  • Use Storytelling: Incorporate personal stories or experiences related to the product. Stories create a connection with your audience and make your content more relatable.
  • Focus on Benefits, Not Just Features: Highlight the benefits of the product, emphasizing how it can positively impact your audience. Explain how the features translate into real-world advantages.
  • Use Clear and Engaging Language: Write in a clear, concise, and easily understandable manner. Avoid jargon or technical language that might confuse your readers.
  • Structure Your Content: Organize your content with headings, subheadings, bullet points, and paragraphs. A well-structured piece is easier to read and keeps your audience engaged.
  • Use Visuals: Incorporate images, infographics, videos, and other visual elements to enhance your content. Visuals can make complex information easier to grasp.
  • Include Call-to-Action (CTA): Guide your readers toward taking the desired action, such as clicking on an affiliate link or making a purchase. Your CTA should be clear, compelling, and relevant to the content.
  • Address Concerns: Anticipate and address potential concerns your readers might have about the product. Providing balanced information shows that you’re considering their best interests.
  • Offer Comparisons: If relevant, compare the affiliate product to alternatives. Provide a balanced comparison that highlights the pros and cons of each option.
  • Showcase Social Proof: Include testimonials, reviews, or case studies that demonstrate the positive experiences of others who have used the product.
  • Optimize for SEO: Use relevant keywords in your content to improve its visibility in search engine results. However, avoid keyword stuffing and focus on creating natural, reader-friendly content.
  • Edit and Proofread: Review your content for grammar, spelling, and punctuation errors. High-quality content should be polished and error-free.
  • Update Regularly: Keep your content up-to-date, especially if you’re promoting products that might have new features or changes over time.
  • Monitor Performance: Track how your affiliate content performs. Analyze metrics like engagement, click-through rates, and conversions to assess what’s working and make improvements.

Remember, the goal of your affiliate marketing content is to genuinely help your audience make informed decisions. When you prioritize their needs and provide valuable insights, you’re more likely to build trust and establish a loyal readership.

How to set call-to-action in an affiliate marketing content

Setting a call-to-action (CTA) in your affiliate marketing content is crucial to guide your readers toward taking the desired action, whether it’s clicking on an affiliate link, signing up for a service, or making a purchase. Here’s how to effectively set a CTA in your content:

  • Be Clear and Direct: Your CTA should clearly convey the action you want your readers to take. Use concise language that leaves no room for ambiguity.
  • Use Action Verbs: Begin your CTA with action-oriented verbs that prompt immediate engagement. For example: “Click here,” “Learn more,” “Get started,” “Shop now,” “Claim your offer.”
  • Make it Relevant: Ensure your CTA is directly related to the content and the product you’re promoting. The CTA should align with the topic of your content and the needs of your audience.
  • Highlight the Benefit: Explain why taking the action is beneficial to the reader. What will they gain by clicking the link or completing the desired action? Clearly state the value proposition.
  • Create Urgency or Scarcity (if applicable): If the offer is time-sensitive or has limited availability, consider adding a sense of urgency or scarcity to your CTA. This can encourage readers to act quickly.
  • Place it Strategically: Position your CTA where it’s easily noticeable. Common placements include at the end of your content, within subheadings, or as a prominent button.
  • Use Contrast and Formatting: Make your CTA visually stand out by using contrasting colors, bold fonts, or larger text sizes. Use formatting to draw attention to the CTA without being overly obtrusive.
  • Keep it Concise: A CTA should be brief and to the point. Avoid lengthy explanations or distractions that might dilute the impact of your message.
  • Use Buttons (if applicable): If you’re creating digital content, consider using buttons to present your CTA. Buttons stand out and are often associated with taking action.
  • Test Different CTAs: Experiment with different CTAs to see which ones resonate best with your audience. A/B testing can help you determine which wording, placement, or design is most effective.
  • Match Your Tone: The tone of your CTA should match the overall tone of your content. If your content is informative and friendly, your CTA should reflect the same tone.
  • Offer Additional Value: If possible, sweeten the deal by mentioning any bonuses, discounts, or extras readers will receive when they take the desired action.
  • Avoid Overloading with CTAs: While it’s important to have a clear CTA, avoid bombarding your content with multiple CTAs that could confuse or overwhelm your readers.
  • Mobile-Friendly CTAs: Ensure your CTAs are easily clickable and readable on mobile devices, as a significant portion of users access content from their smartphones.
  • Test Responsiveness: Check that your CTA links are functioning properly and directing users to the correct landing pages.

Remember, the ultimate goal of your affiliate marketing content is to provide value to your readers while guiding them toward taking action. A well-crafted CTA can significantly influence your readers’ decisions and boost your affiliate marketing

A Complete guideline for the beginners to use Elementor in WordPress

A Complete guideline for the beginners to use Elementor in WordPress

A Complete guideline for the beginners to use Elementor  in WordPress

Are you new to WordPress and looking to design stunning websites without any coding knowledge? Look no further than Elementor, a powerful and user-friendly page builder plugin that can transform your website building experience. In this comprehensive guide, we’ll walk you through the essential steps to get started with Elementor and create visually appealing web pages that leave a lasting impression.

Introduction to Elementor:

What is Elementor?

Elementor is a popular drag-and-drop page builder plugin for WordPress. It allows users to create and design custom web pages without needing to have advanced coding skills. Elementor provides an intuitive and user-friendly interface that empowers both beginners and experienced website creators to build visually appealing and functional websites.

Key features of Elementor include:

  • Drag-and-Drop Interface: Elementor enables users to easily add and arrange elements on their web pages by simply dragging and dropping widgets onto the page canvas.
  • Pre-designed Templates: The plugin comes with a variety of pre-designed templates for different types of pages, including homepages, contact pages, about pages, and more. These templates serve as starting points for customization.
  • Widgets and Elements: Elementor offers a wide range of widgets and elements, such as text, images, buttons, videos, forms, sliders, and more. These elements can be customized and styled to fit your website’s design.
  • Responsive Design: Elementor allows you to design responsive websites that look great on various devices and screen sizes, ensuring a consistent user experience.
  • Theme Builder: With Elementor’s theme builder, you can design and customize headers, footers, and other theme-related elements to match your website’s branding and style.
  • Live Editing: One of Elementor’s standout features is its live editing capabilities. You can see changes in real-time as you make them, eliminating the need for constant previewing.
  • Global Widgets and Styles: You can create and save global widgets and styles, making it easy to maintain consistency across your website and update elements in one place.
  • Third-party Integrations: Elementor seamlessly integrates with various third-party plugins, allowing you to add advanced functionality like e-commerce, forms, and more.
  • Developer-Friendly: While it’s user-friendly for non-developers, Elementor also offers hooks and filters for developers to extend its functionality and create custom elements.
  • Regular Updates: The Elementor team regularly releases updates, adding new features, improving performance, and ensuring compatibility with the latest versions of WordPress.
  • Elementor comes in both free and premium versions. The free version offers a robust set of features, while the premium version, Elementor Pro, provides additional advanced features, templates, widgets, and priority support.

Why use Elementor?

Using Elementor offers several compelling reasons for both beginners and experienced WordPress users. Here are some of the key benefits of using Elementor:

  • User-Friendly Interface: Elementor provides an intuitive drag-and-drop interface that makes it easy for users of all skill levels to create and design web pages without writing a single line of code.
  • Time Efficiency: With Elementor, you can build and customize web pages quickly, reducing the time it takes to design and launch your website. Its real-time editing feature allows you to see changes as you make them, saving you time on constant previewing.
  • No Coding Skills Required: You don’t need to be a developer to create stunning web pages with Elementor. Its visual editor eliminates the need for coding knowledge, empowering non-technical users to build professional-looking websites.
  • Customization Freedom: Elementor provides a wide range of widgets and elements that you can customize to fit your website’s branding and style. You have full creative control over layouts, colors, fonts, and more.
  • Responsive Design: Elementor ensures that your website looks great on all devices by allowing you to create responsive designs. You can customize how elements appear on different screen sizes to provide a seamless user experience.
  • Pre-designed Templates: Elementor comes with a variety of pre-designed templates for various page types. These templates can serve as starting points and save you time in designing from scratch.
  • Theme Builder: With Elementor’s theme builder feature, you can create and customize headers, footers, and other theme-related elements to match your website’s design and branding.
  • Global Widgets and Styles: You can create global widgets and styles that can be applied consistently across multiple pages. This ensures a cohesive design and makes updates more efficient.
  • Regular Updates and Additions: Elementor is continually updated with new features, improvements, and widgets. This means you can keep your website up-to-date and take advantage of the latest design trends.
  • Integration with Third-party Plugins: Elementor seamlessly integrates with various third-party plugins, allowing you to extend your website’s functionality without compatibility issues.
  • Developer-Friendly: For those with coding skills, Elementor offers hooks and filters for custom development, giving developers the flexibility to add custom functionality.
  • Community and Support: Elementor has a large and active community, which means you can find tutorials, guides, and help from other users. Elementor Pro users also receive priority support from the official team.
  • Cost-Effective: While Elementor Pro has a premium version, the free version still offers a significant number of features that can help you build a high-quality website without additional costs.


Getting Started:

Installing and activating the Elementor plugin.

Installing and activating the Elementor plugin is a straightforward process. Here’s a step-by-step guide on how to do it:

Method 1: Installing from the WordPress Plugin Repository:

  • Log in to Your WordPress Dashboard: Access your WordPress website’s admin area by entering your website’s URL followed by “/wp-admin”.
  • Navigate to the Plugins Section: In the left-hand menu, hover over “Plugins” and then click on “Add New.”
  • Search for Elementor: In the search bar at the top right corner of the page, type “Elementor.”
  • Install the Plugin: Find the Elementor plugin in the search results and click the “Install Now” button next to it.
  • Activate the Plugin: After installation is complete, click the “Activate” button to activate the Elementor plugin.
  • Plugin Activation Wizard (Optional): Once activated, you might be directed to the Elementor setup wizard. Follow the wizard’s instructions to complete the setup.

Method 2: Uploading the Plugin Zip File:

  • Download the Elementor Plugin: If you prefer to download the Elementor plugin from its official website, you can do so by visiting the Elementor website and downloading the plugin zip file.
  • Log in to Your WordPress Dashboard: Access your WordPress website’s admin area.
  • Navigate to the Plugins Section: In the left-hand menu, hover over “Plugins” and then click on “Add New.”
  • Upload the Plugin: Click the “Upload Plugin” button at the top of the page.
  • Choose File and Upload: Click the “Choose File” button and select the Elementor plugin zip file you downloaded. Then, click the “Install Now” button.
  • Activate the Plugin: After installation is complete, click the “Activate” button to activate the Elementor plugin.
  • Plugin Activation Wizard (Optional): Similar to the first method, you might be directed to the Elementor setup wizard. Follow the wizard’s instructions to complete the setup.


Exploring the Elementor interface.

Exploring the Elementor interface is essential to understanding how to effectively design and customize your WordPress pages. Let’s take a closer look at the different sections and features of the Elementor interface:

Adding a New Page with Elementor:

  • After activating the Elementor plugin, create a new page or edit an existing one.
  • Click the “Edit with Elementor” button to start designing the page using Elementor.

Elementor Editor Interface:

  • Canvas Area: This is where you design your page. It’s divided into sections and columns.
  • Add New Section: Click the “+ Add New Section” button to create a new content section.
  • Widgets Panel: On the left, you’ll find the Widgets Panel. It contains various widgets you can drag and drop onto your page.
  • Settings Panel: On the left, the Settings Panel allows you to configure the overall section, column, and widget settings.

Sections and Columns:

  • Sections help structure your page layout vertically.
  • Columns divide sections horizontally and hold widgets.
  • You can adjust section and column settings like background, padding, margins, and more.

Widgets:

  • Widgets are elements you can drag and drop into columns to add content.
  • Examples include text, images, buttons, videos, headings, forms, and more.
  • Customize widget content, styling, and advanced settings using the Widgets Panel.

Widget Controls:

  • Each widget has controls like “Drag Handle” to move it, “Duplicate” to make a copy, and “Delete” to remove it.
  • The “Edit” button opens the widget’s settings for customization.

Templates and Library:

  • Access the “Templates” button to load pre-designed templates for various page types.
  • You can also save your sections or entire pages as templates for future use.
  • The “My Templates” section lets you manage your saved templates.

Responsive Editing:

  • Toggle between different device views (desktop, tablet, mobile) to optimize the design for each screen size.
  • Customize widget visibility for specific devices using the Visibility feature.

Style Tab:

  • Customize the design of sections, columns, and widgets using the Style tab.
  • Adjust typography, colors, spacing, borders, and other visual elements.

Advanced Settings:

  • Access advanced settings for widgets and sections to control animations, positioning, and more.
  • Use these settings to fine-tune the behavior and appearance of your elements.

Preview and Update:

  • Click the “Preview” button to see how your page looks before publishing.
  • Once you’re satisfied, click the “Update” button to save your changes and make them live.

Undo and Redo:

  • Use the undo and redo buttons at the bottom of the screen to reverse or redo recent actions.

Navigator:

  • The Navigator allows you to see an overview of all the sections and widgets on your page.
  • It’s especially useful for managing complex layouts.

By familiarizing yourself with these aspects of the Elementor interface, you’ll be able to harness its full potential to create visually appealing, responsive, and functional web pages for your WordPress website.

Creating Your First Page:

    • Choosing a template or starting from scratch.
    • Drag-and-drop elements: Adding sections, columns, and widgets.
    • Editing content: Text, images, videos, and more.

Customizing with Style:

    • Using the style tab to adjust fonts, colors, and spacing.
    • Leveraging advanced settings for more precise customization.
    • Adding custom CSS if needed.

Exploring Widgets:

    • Understanding the various Elementor widgets (text, image, button, video, etc.).
    • Using third-party widgets to extend functionality.
    • Tips for organizing and aligning widgets effectively.

Mastering Sections and Columns:

    • Creating responsive layouts with sections and columns.
    • Adjusting column widths and gaps.
    • Saving and reusing sections/columns as templates.

Working with Templates:

    • Utilizing pre-designed templates for quick page creation.
    • Customizing templates to match your brand and content.
    • Saving and exporting templates for future use.

Mobile Responsiveness:

    • Ensuring your designs look great on all devices.
    • Using Elementor’s mobile editing features.
    • Previewing and testing responsiveness.

Advanced Features:

    • Using dynamic content and global widgets.
    • Building pop-ups, forms, and interactive elements.
    • Integrating Elementor with other plugins and tools.

Optimization and Performance:

    • Tips for optimizing page speed while using Elementor.
    • Minimizing bloat and unnecessary elements.
    • Checking compatibility with different browsers.

Saving and Publishing:

    • Regularly saving your work to avoid data loss.
    • Previewing your design before publishing.
    • Hitting the “Publish” button and making your page live.

Troubleshooting and Support:

    • Common issues and how to resolve them.
    • Using Elementor’s official documentation and community forums.
    • Seeking professional help when needed.

Staying Updated:

    • Keeping your Elementor plugin and WordPress version up to date.
    • Exploring new features introduced in updates.
    • Learning from tutorials and online resources.

With Elementor, you have the power to create beautiful and functional websites without the need for advanced coding skills. By following this complete guideline for beginners, you’ll gain confidence in using Elementor’s intuitive drag-and-drop interface, unlock its powerful features, and craft web pages that resonate with your audience. So, dive in, experiment, and watch your creativity come to life with Elementor and WordPress!


How to create WordPress Elementor header and footer for free

Creating a WordPress header and footer using Elementor for free is a fantastic way to design a cohesive and professional-looking website. Here’s a step-by-step guide on how to achieve this:

Step 1: Install and Activate Elementor: If you haven’t already, install and activate the Elementor plugin on your WordPress website. You can do this by navigating to your WordPress dashboard, going to “Plugins,” clicking “Add New,” searching for “Elementor,” and then installing and activating the plugin.

Step 2: Install Elementor Hello Theme: For a lightweight and customizable theme that works well with Elementor, consider installing the “Hello” theme developed by the same team behind Elementor. You can find and install the Hello theme through the “Themes” section in your WordPress dashboard.

Step 3: Create a Header:

  • Navigate to “Templates” in the Elementor section of your WordPress dashboard.
  • Click on “Header” and then “Add New.”
  • Choose a name for your header template and click “Create Header.”
  • You’ll be directed to the Elementor editor. Here, you can start designing your header using the drag-and-drop interface. Add elements like the site logo, navigation menu, contact information, and more.
  • Customize the styling of your header using the various options in Elementor’s styling panel.
  • Once you’re satisfied with your header design, click the “Save” button.

Step 4: Create a Footer:

  • Similarly, navigate to “Templates” in the Elementor section of your WordPress dashboard.
  • Click on “Footer” and then “Add New.”
  • Give your footer template a name and click “Create Footer.”
  • Use the Elementor editor to design your footer by adding widgets such as copyright text, social media icons, contact details, and more.
  • Customize the appearance of your footer using Elementor’s styling options.
  • Click “Save” when you’re done designing your footer.

Step 5: Assign Header and Footer:

  • After saving both your header and footer templates, you’ll be redirected to the Templates library.
  • Click on the header template you created, and from the dropdown menu, select “Display Conditions.”
  • Choose where you want the header to appear. You can select options like “Entire Site” or specific pages.
  • Repeat the process for the footer template to assign it to the desired locations.

Step 6: Preview and Publish: Visit your website to see the new header and footer in action. You can navigate through different pages to ensure they are consistently displayed across your site. Make any necessary adjustments in the Elementor editor and save changes as needed.

Congratulations! You’ve successfully created and implemented a custom WordPress header and footer using Elementor for free. This approach allows you to maintain a consistent design throughout your website while enjoying the flexibility and ease of use that Elementor provides.

How To Speed Up Your Slow WordPress Elementor Website And Pass Core Web Vitals issues

Speeding up a slow WordPress website built with Elementor and addressing Core Web Vitals issues is crucial for providing a better user experience and improving your site’s search engine rankings. Here’s a step-by-step guide to help you optimize your website and pass Core Web Vitals tests:

Step 1: Measure Your Current Performance: Before making any changes, use tools like Google PageSpeed Insights, GTmetrix, or Pingdom to assess your website’s current performance. This will help you identify specific areas that need improvement.

Step 2: Choose a Fast Hosting Provider: A reliable and fast hosting provider is essential. Opt for managed WordPress hosting or a reputable shared hosting provider with solid performance and server-side caching.

Step 3: Optimize Images: Large images can slow down your website. Use an image optimization plugin like Smush or Imagify to compress and resize images without compromising quality.

Step 4: Use a Caching Plugin: Caching plugins like W3 Total Cache or WP Super Cache can significantly speed up your website by storing static versions of your pages and serving them to visitors.

Step 5: Minimize CSS and JavaScript: Reduce the number of external scripts and stylesheets by combining them and minifying the code. This can be done using plugins like Autoptimize or WP Rocket.

Step 6: Enable Browser Caching: Implement browser caching to instruct visitors’ browsers to store certain files locally. This reduces the need to re-download files on subsequent visits.

S7: Use a Content Delivery Network (CDN)tep : A CDN distributes your website’s assets across multiple servers, reducing the distance between your server and visitors. This can significantly improve loading times.

Step 8: Choose a Lightweight Theme: If you’re not using Elementor’s Hello Theme, consider switching to a lightweight and fast theme. A lightweight theme reduces the amount of unnecessary code and bloat.

Step 9: Optimize Fonts: Use system fonts or minimize the number of custom fonts to reduce the font loading time.

Step 10: Disable Unused Plugins and Widgets: Deactivate and delete any plugins and widgets that you’re not using. Unused plugins can add unnecessary weight to your site.

Step 11: Implement Lazy Loading: Lazy loading delays the loading of images and videos until the user scrolls down to them. This reduces initial page load times.

Step 12: Optimize Database: Use a plugin like WP-Optimize to clean up and optimize your WordPress database, removing unnecessary data and improving overall performance.

Step 13: Address Core Web Vitals: Google’s Core Web Vitals measure user-centric website performance. Focus on improving three key metrics:

  • Largest Contentful Paint (LCP): Ensure your largest element loads within 2.5 seconds.
  • First Input Delay (FID): Make sure your site responds quickly to user interactions.
  • Cumulative Layout Shift (CLS): Avoid unexpected layout shifts that disrupt the user experience.

Step 14: Regular Maintenance: Regularly update your WordPress, plugins, and themes to ensure you’re using the latest versions with performance improvements and bug fixes.

Step 15: Test and Monitor: After implementing these optimizations, test your website’s performance using various tools and monitor its performance over time. Make adjustments as needed.

By following these steps, you can significantly improve the speed of your WordPress Elementor website and address Core Web Vitals issues, leading to a smoother user experience and better search engine rankings.

How To Speed Up Your Slow WordPress Elementor Website And Pass Core Web Vitals issues for free

Speeding up a slow WordPress Elementor website and passing Core Web Vitals issues without spending money is possible, although it might require more manual work. Here’s a step-by-step guide to help you achieve this without incurring additional costs:

Step 1: Measure Your Website’s Performance: Use free tools like Google PageSpeed Insights, GTmetrix, or Pingdom to assess your website’s current performance and identify specific areas that need improvement.

Step 2: Choose a Lightweight Theme: If you’re not already using it, consider switching to the Elementor Hello Theme, which is lightweight and designed for optimal compatibility with Elementor.

Step 3: Optimize Images Manually: Resize and compress your images before uploading them to your website. Use free image optimization tools like TinyPNG or Optimizilla to reduce file sizes while maintaining quality.

Step 4: Minimize CSS and JavaScript: Optimize your CSS and JavaScript by manually removing unnecessary code, combining files, and minifying the remaining code. This can be done using tools like Online CSS Minifier and JavaScript Minifier.

Step 5: Enable Browser Caching: Leverage browser caching by adding code to your website’s .htaccess file. You can find free tutorials online to guide you through this process.

Step 6: Utilize a Free Caching Plugin: Plugins like W3 Total Cache or WP Super Cache offer free versions that provide caching and performance optimization features.

Step 7: Implement Lazy Loading: Enable lazy loading for images and videos using free plugins like “a3 Lazy Load” or “Lazy Load by WP Rocket.”

Step 8: Optimize Fonts: Choose system fonts or limit the number of custom fonts to reduce font loading times. You can also use free font optimization tools to minimize font file sizes.

Step 9: Disable Unused Plugins and Widgets: Deactivate and delete any unused plugins and widgets to reduce unnecessary code and potential performance bottlenecks.

Step 10: Optimize Database Manually: Regularly clean your WordPress database by removing post revisions, spam comments, and other unnecessary data. You can use the free plugin “WP-Optimize” to help with this.

Step 11: Address Core Web Vitals: Focus on optimizing Largest Contentful Paint (LCP), First Input Delay (FID), and Cumulative Layout Shift (CLS):

  • LCP: Optimize images, use a fast hosting provider, and minimize third-party scripts.
  • FID: Minimize JavaScript execution and prioritize critical scripts.
  • CLS: Specify dimensions for images and videos to prevent layout shifts.

Step 12: Regular Maintenance: Keep your WordPress, plugins, and themes up to date to ensure you’re benefiting from performance improvements and bug fixes.

Step 13: Test and Monitor: Continuously test your website’s performance using the same free tools and monitor its performance over time. Make adjustments as necessary.

While free methods require more manual effort, following these steps will help you significantly improve your slow WordPress Elementor website’s speed and address Core Web Vitals issues without spending money on premium tools or services. [Learn More visit our website: webcitylab.com ]


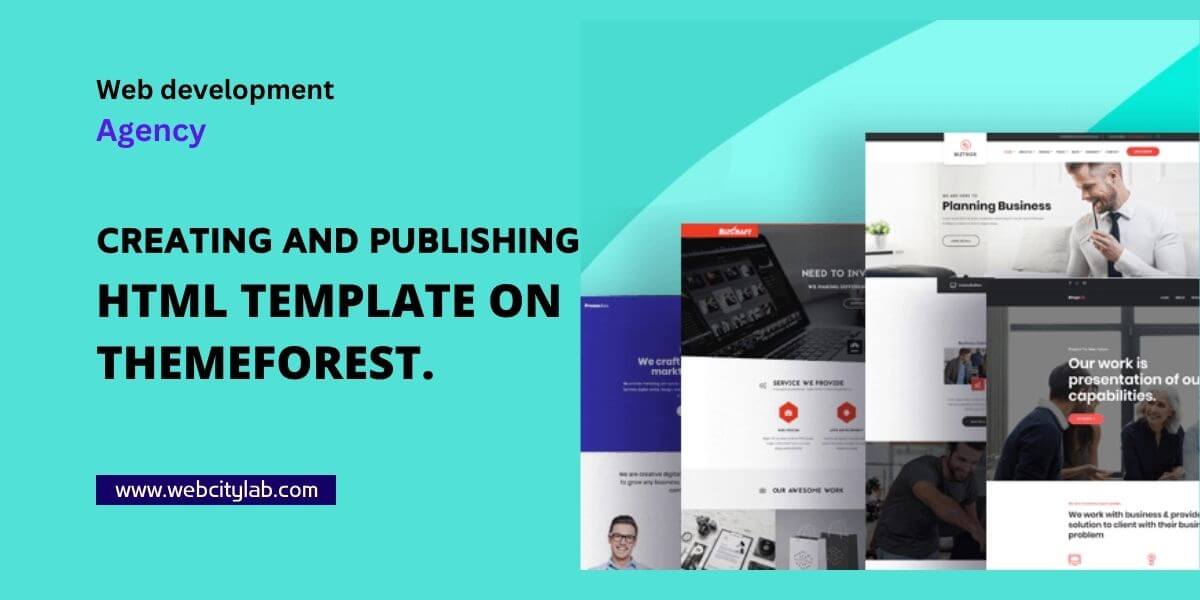
Creating and Publishing HTML Template on ThemeForest: A Short Guideline

Creating and Publishing HTML Template on ThemeForest: A Short Guideline

Title: Creating and Publishing HTML Template on ThemeForest: A Short Guideline

Introduction: Publishing your HTML template on ThemeForest can be a rewarding experience that not only showcases your design skills but also generates income. This short guideline outlines the essential steps to help you create and publish a successful HTML template on ThemeForest.

Step 1: Research and Conceptualization

Research and ConceptualizationResearch and Conceptualization Before you start designing, research the market to identify popular trends and user preferences. Consider the niche you want to target and create a clear concept for your template. Understand the specific features and design elements that potential buyers are looking for.

Step 2: Design and Development
  • Wireframing: Create a wireframe of your template’s layout to plan its structure and user flow.
  • Visual Design: Craft a visually appealing design that aligns with your chosen concept. Pay attention to typography, color schemes, and graphics that complement the theme.
  • Responsive Design: Ensure your template is responsive and looks great on various devices and screen sizes.
  • User Experience (UX): Design with user experience in mind. Keep navigation intuitive, load times minimal, and interactions seamless.
Step 3: Coding
  • Clean HTML/CSS: Write clean, organized, and well-commented HTML and CSS code.
  • JavaScript: Add interactivity and functionality using JavaScript/jQuery, keeping performance and compatibility in mind.
  • Optimization: Optimize your code and assets for fast loading times.
Step 4: Features and Components

Features and Components Integrate relevant features and components that enhance the template’s usability and appeal, such as sliders, forms, animations, and social media integration.

Step 5: Testing
  • Cross-Browser Compatibility: Test your template on various web browsers (Chrome, Firefox, Safari, etc.) to ensure consistent performance.
  • Mobile Testing: Test your template on different devices to ensure responsiveness.
  • Functionality Testing: Verify that all interactive elements, forms, and features work as intended.
Step 6: Documentation

Documentation Create comprehensive documentation that guides buyers through installing, customizing, and using your template. Include clear instructions and screenshots where necessary.

Step 7: Package Preparation
  • ZIP Folder: Organize your template files neatly in a ZIP folder.
  • Licensing: Ensure you have the right to use any assets, fonts, or third-party tools you’ve included.
  • Demo Content: If applicable, include sample content that demonstrates your template’s features.
Step 8: Uploading to ThemeForest
  • ThemeForest Account: If you don’t have one, create an account on ThemeForest.
  • Template Submission: Go to the “Author Dashboard” and navigate to “Upload Item.” Fill in all the required information, including a catchy title, informative description, and relevant tags.
  • Upload Files: Upload your ZIP folder, preview images, and screenshots.
  • Demo Link: Provide a live demo link where buyers can interact with your template.
Step 9: Review and Approval

Review and Approval Your template will go through a review process by ThemeForest staff. Make sure your template adheres to their quality standards and guidelines.

Step 10: Launch and Promotion

Launch and Promotion Once your template is approved, celebrate your achievement and promote it through your social media channels, website, and relevant online communities.

Creating and publishing an HTML template on ThemeForest demands a blend of design skills, coding proficiency, and attention to user experience. By following this short guideline, you’ll be well on your way to offering a valuable product to potential buyers while contributing to the vibrant ThemeForest marketplace.


Theme Item Preparation & Technical Requirements for ThemeForest

Publishing HTML Template on ThemeForest can be a lucrative endeavor, provided your theme meets the platform’s technical requirements and is well-prepared for submission. This guide outlines the crucial steps and technical considerations for preparing and submitting your theme to ThemeForest.

Step 1: Theme Design and Conceptualization

Theme Design and Conceptualization Begin by conceptualizing your theme. Research market trends, identify target niches, and define the design concept. Your theme’s visual appeal and unique features will play a significant role in attracting potential buyers.

Step 2: Design and Development
  • Responsive Design: Craft a design that is responsive and adapts seamlessly to various devices and screen sizes.
  • User Experience (UX): Prioritize a user-friendly interface, clear navigation, and intuitive interactions.
  • Typography and Color Palette: Choose typography and color schemes that align with your theme’s concept and provide a visually appealing experience.
Step 3: Technical Considerations
  • Code Quality: Write clean, well-structured, and commented code for both HTML/CSS and JavaScript.
  • Cross-Browser Compatibility: Test your theme on multiple browsers (Chrome, Firefox, Safari, etc.) to ensure consistent performance.
  • Performance Optimization: Optimize your code and assets for fast loading times and smooth performance.
  • Accessibility: Ensure your theme is accessible to users with disabilities, adhering to WCAG guidelines.
  • Security: Implement secure coding practices to protect users and data.
Step 4: Features and Functionality
  • Customization Options: Provide users with customization options for layout, colors, fonts, and other elements.
  • Widget Support: Integrate widget areas to enhance user customization.
  • Plugins Compatibility: Ensure compatibility with popular plugins to extend functionality.
  • Demo Content: Include sample content to demonstrate various layout options and features.
Step 5: Documentation

Documentation Create comprehensive documentation that guides users through theme installation, customization, and use. Include step-by-step instructions and visual aids.

Step 6: Package Preparation
  • ZIP Folder: Organize all theme files and assets in a well-structured ZIP folder.
  • Licensing: Make sure you have proper licensing for any third-party assets or tools included in your theme.
  • Demo Content: Provide separate files for demo content if applicable.
Step 7: ThemeForest Submission
  • ThemeForest Account: Create or log in to your ThemeForest account.
  • Upload Item: Access the “Author Dashboard” and navigate to “Upload Item.” Complete all required fields, including title, description, and tags.
  • Upload Files: Upload your ZIP folder, preview images, and screenshots.
  • Documentation: Attach your comprehensive documentation in a readable format.
  • Demo Link: Include a live demo link for potential buyers to explore.

Step 8: Review and Approval ThemeForest staff will review your submission for quality, functionality, and adherence to their guidelines. Address any feedback or required changes promptly.

By adhering to ThemeForest’s technical requirements and following the steps outlined in this guide, you’ll increase your chances of successfully submitting your theme. Remember, a well-prepared theme with high-quality code, exceptional design, and robust functionality will not only meet buyer expectations but also contribute to your success as a ThemeForest author.

How to set a timeline for creating html template for themeforest

Setting a timeline for creating an HTML template for ThemeForest involves careful planning and organization. Here’s a step-by-step guide to help you establish a realistic timeline:

Define the Scope:

  • Clearly outline the features, design elements, and functionality you intend to include in your HTML template.
  • Identify any unique or complex aspects that might require more time for development.

Break Down the Project:

  • Divide the project into smaller tasks, such as wireframing, design, coding, testing, documentation, and submission preparation.

Estimate Time for Each Task:

  • Estimate the amount of time each task will take. Be realistic and consider any potential setbacks or learning curves.
  • Add buffer time for unexpected challenges or revisions.

Set Milestones:

  • Establish milestone points throughout the project to track your progress.
  • Assign specific tasks to each milestone, such as completing the design, implementing features, and finalizing documentation.

Prioritize Tasks:

  • Arrange tasks in order of priority. Start with essential components before moving to secondary features.
  • This ensures that the core functionality and design are addressed first.

Allocate Time for Revisions:

  • Set aside time for revisions and improvements based on feedback from testing and reviews.
  • Iteration is a crucial part of the design and development process.

Consider External Factors:

  • Account for external factors that might impact your timeline, such as holidays, personal commitments, or unforeseen events.

Plan for Quality Assurance:

  • Allocate time for thorough testing to identify and fix any bugs, inconsistencies, or issues.
  • This step is crucial to deliver a high-quality and reliable template.

Documentation:

  • Plan time for creating comprehensive documentation that will help users understand and utilize your template effectively.

Submission Preparation:

  • Dedicate time to prepare all necessary files, documentation, demo content, and other assets for submission to ThemeForest.

Buffer Time:

  • Include buffer time at the end of your timeline to account for unexpected delays or additional revisions.

Review and Adjust:

  • Regularly review your progress against the established milestones.
  • If you’re falling behind or encountering unexpected challenges, adjust your timeline accordingly.

Final Polishing:

  • In the last phase, allocate time for a final review and polishing of your HTML template to ensure it meets your quality standards.

Submission:

  • Allocate time to go through ThemeForest’s submission process, which includes uploading your files, completing forms, and providing documentation.

Launch and Promotion:

  • Plan for the launch of your template and allocate time for promotion through social media, forums, and other relevant channels.

Remember that every project is unique, and the timeline may vary based on the complexity of your HTML template, your familiarity with the design and coding process, and your available resources. Be flexible, and don’t hesitate to adjust your timeline as needed to ensure a high-quality final product.

How to make a marketing plan

How to make a marketing plan

To create a marketing plan, we’ll need to go through a structured approach. Here’s a step-by-step guide to developing a comprehensive marketing plan for your business:

  • Executive Summary: Provide an overview of your business, its products or services, target market, and key marketing objectives. This section is a brief summary of the entire marketing plan.
  • Market Analysis: Conduct a thorough analysis of the market in which your business operates. Identify your target audience, market size, trends, and the needs of your customers. Understand your competitors and what sets your business apart from them.
  • SWOT Analysis: Perform a SWOT analysis (Strengths, Weaknesses, Opportunities, and Threats) of your business. Assess your internal strengths and weaknesses and identify external opportunities and threats.
  • Marketing Objectives: Set clear, measurable, and achievable marketing objectives. These objectives should align with your overall business goals. Examples include increasing market share, boosting sales, or launching a new product.
  • Target Audience: Clearly define your target audience or buyer persona. Understand their demographics, preferences, behavior, and pain points. This information will help you tailor your marketing efforts to better reach and engage with them.
  • Unique Selling Proposition (USP): Identify and highlight your Unique Selling Proposition – what makes your product or service unique and better than your competitors’.
  • Marketing Strategies: Develop specific marketing strategies to achieve your objectives. These strategies should include elements of the marketing mix, known as the 4Ps – Product, Price, Place, and Promotion. For example:
    • Product: Enhancing existing products or introducing new ones.
    • Price: Setting competitive prices or offering discounts and promotions.
    • Place: Determining distribution channels and sales locations.
    • Promotion: Outlining advertising, public relations, and digital marketing plans.
  • Budget Allocation: Determine the budget required for implementing the marketing strategies. Allocate the budget to different marketing activities based on their potential impact and cost-effectiveness.
  • Timeline and Implementation: Create a timeline for the execution of each marketing activity. Assign responsibilities to team members, set deadlines, and ensure the marketing plan is well-implemented.
  • Monitoring and Evaluation: Establish key performance indicators (KPIs) to measure the success of your marketing efforts. Regularly monitor and evaluate the performance of each strategy and adapt the plan if necessary.
  • Risk Assessment: Identify potential risks and challenges that could impact the success of your marketing plan. Develop contingency plans to mitigate these risks.
  • Long-Term Sustainability: Consider the long-term sustainability of your marketing efforts. Focus on building strong customer relationships, brand loyalty, and a positive brand image.

Remember, a marketing plan is a dynamic document that may need adjustments over time based on changing market conditions, customer feedback, and business goals. Stay flexible and be willing to adapt your strategies as needed.

Please note that without specific information about your business, industry, and target market, this marketing plan is a general outline. For a more tailored plan, you’ll need to provide more details. Please contact us if you need any help.

What is the best marketing plan for web development and digital marketing agencies?

For a web development and digital marketing agency, the marketing plan should focus on showcasing the agency’s expertise, building credibility, and attracting potential clients. Here’s a comprehensive marketing plan tailored to such an agency:

  • Website Optimization: Ensure your agency’s website is user-friendly, visually appealing, and showcases your portfolio of web development and digital marketing projects. Optimize it for search engines (SEO) to increase organic traffic.
  • Content Marketing: Produce high-quality and valuable content related to web development and digital marketing. This could include blog posts, case studies, infographics, and videos. Share this content on your website and social media platforms to establish your agency as a thought leader in the industry.
  • Social Media Marketing: Utilize major social media platforms (e.g., LinkedIn, Twitter, Facebook) to promote your agency’s services, engage with your audience, and share your content. Participate in relevant industry discussions and build a community of followers.
  • Email Marketing: Build an email list and send regular newsletters or updates to potential clients. Provide useful insights, tips, and information about your services to keep your audience engaged and informed.
  • Client Testimonials and Case Studies: Showcase success stories and positive client testimonials on your website. Case studies highlighting your agency’s digital marketing and web development achievements will build trust and credibility.
  • Partnerships and Collaborations: Form strategic partnerships with other businesses in related industries, such as graphic design studios, content creators, or SEO agencies. This can expand your reach and lead to mutual referrals.
  • Paid Advertising: Consider running paid advertising campaigns on platforms like Google Ads or social media to target potential clients who are actively searching for web development and digital marketing services.
  • Webinars and Workshops: Host webinars or workshops on topics related to web development and digital marketing. These events can position your agency as an authority in the field and attract potential clients.
  • Search Engine Optimization (SEO): Optimize your website and content for relevant keywords to improve your organic search rankings. This will help potential clients find your agency when searching for web development and digital marketing services.
  • Local Marketing: If your agency serves a specific geographic area, focus on local marketing strategies. This includes local SEO, attending local business events, and collaborating with local organizations.
  • Referral Program: Implement a referral program to encourage satisfied clients to refer new clients to your agency. Word-of-mouth marketing can be powerful in attracting new business.
  • Continuous Learning and Development: Stay updated with the latest trends and advancements in web development and digital marketing. This will showcase your agency’s expertise and ensure you offer cutting-edge solutions to your clients.

Remember to regularly monitor the performance of your marketing efforts, track key performance indicators (KPIs), and adapt your strategies based on the results. A successful marketing plan is an ongoing and iterative process that responds to changes in the market and the needs of your target audience.

Web Design and Development Services Empowering Your Online Presence

Web Design and Development Services Empowering Your Online Presence

In today’s digital age, having a captivating and user-friendly website is crucial for any business or organization. A professional web design and development agency can transform your online presence, making it visually appealing, functional, and tailored to your specific needs. In this article, we’ll explore the key aspects of web design and development services and how they can elevate your online business to new heights.

  • Understanding Web Design and Development Services: Web design and development services encompass a wide range of tasks aimed at creating and enhancing websites. Web design involves the aesthetic elements of a website, such as layout, colors, typography, and graphics. On the other hand, web development focuses on the technical implementation, functionality, and performance of the website. A comprehensive agency offers both services to ensure a seamless and successful website.
  • Crafting an Eye-catching Web Design: A well-designed website is the first impression that visitors get of your brand. A professional web design agency will collaborate with you to understand your business goals, target audience, and unique selling points. They will create a visually engaging website that represents your brand identity and captures the attention of your visitors. Whether you need a simple portfolio site or a complex e-commerce platform, a web design agency can tailor the design to your requirements.
  • Building Responsive and User-Friendly Websites: In today’s mobile-driven world, responsive web design is essential. A proficient web development agency will ensure that your website adapts seamlessly to various screen sizes, providing an optimal user experience on smartphones, tablets, and desktops. Moreover, user-friendliness is crucial for retaining visitors. A well-structured and intuitive navigation system will help users find the information they seek easily, increasing engagement and conversions.
  • Leveraging WordPress Website Development Services: WordPress is a popular and powerful content management system (CMS) used by millions of websites worldwide. A reputable web design and development agency will have expertise in WordPress website development. They can create a custom WordPress site or customize existing themes to match your brand and functionality requirements. WordPress allows easy content management, ensuring you can update your website with new content effortlessly.
  • Tailoring Web Development Solutions: Web development involves turning the design into a fully functional website. Expert developers can build custom web applications, integrate third-party plugins, and ensure a secure and optimized website. They stay updated with the latest web technologies to provide efficient and future-proof solutions.
  • Choosing the Right Web Design and Development Company: Selecting the right web design and development company is crucial to achieving your online goals. Look for agencies with a strong portfolio showcasing their expertise in various industries. Read client testimonials and reviews to gauge their reputation and customer satisfaction. Additionally, consider the agency’s communication skills, project management, and ability to deliver projects on time and within budget.

Web design and development services play a pivotal role in establishing a strong online presence for businesses and organizations. By collaborating with a skilled web design and development agency, you can create a visually appealing, functional, and user-friendly website that effectively represents your brand and engages your target audience. Embrace the power of web design and development to stay ahead in the competitive digital landscape and achieve your online business objectives.

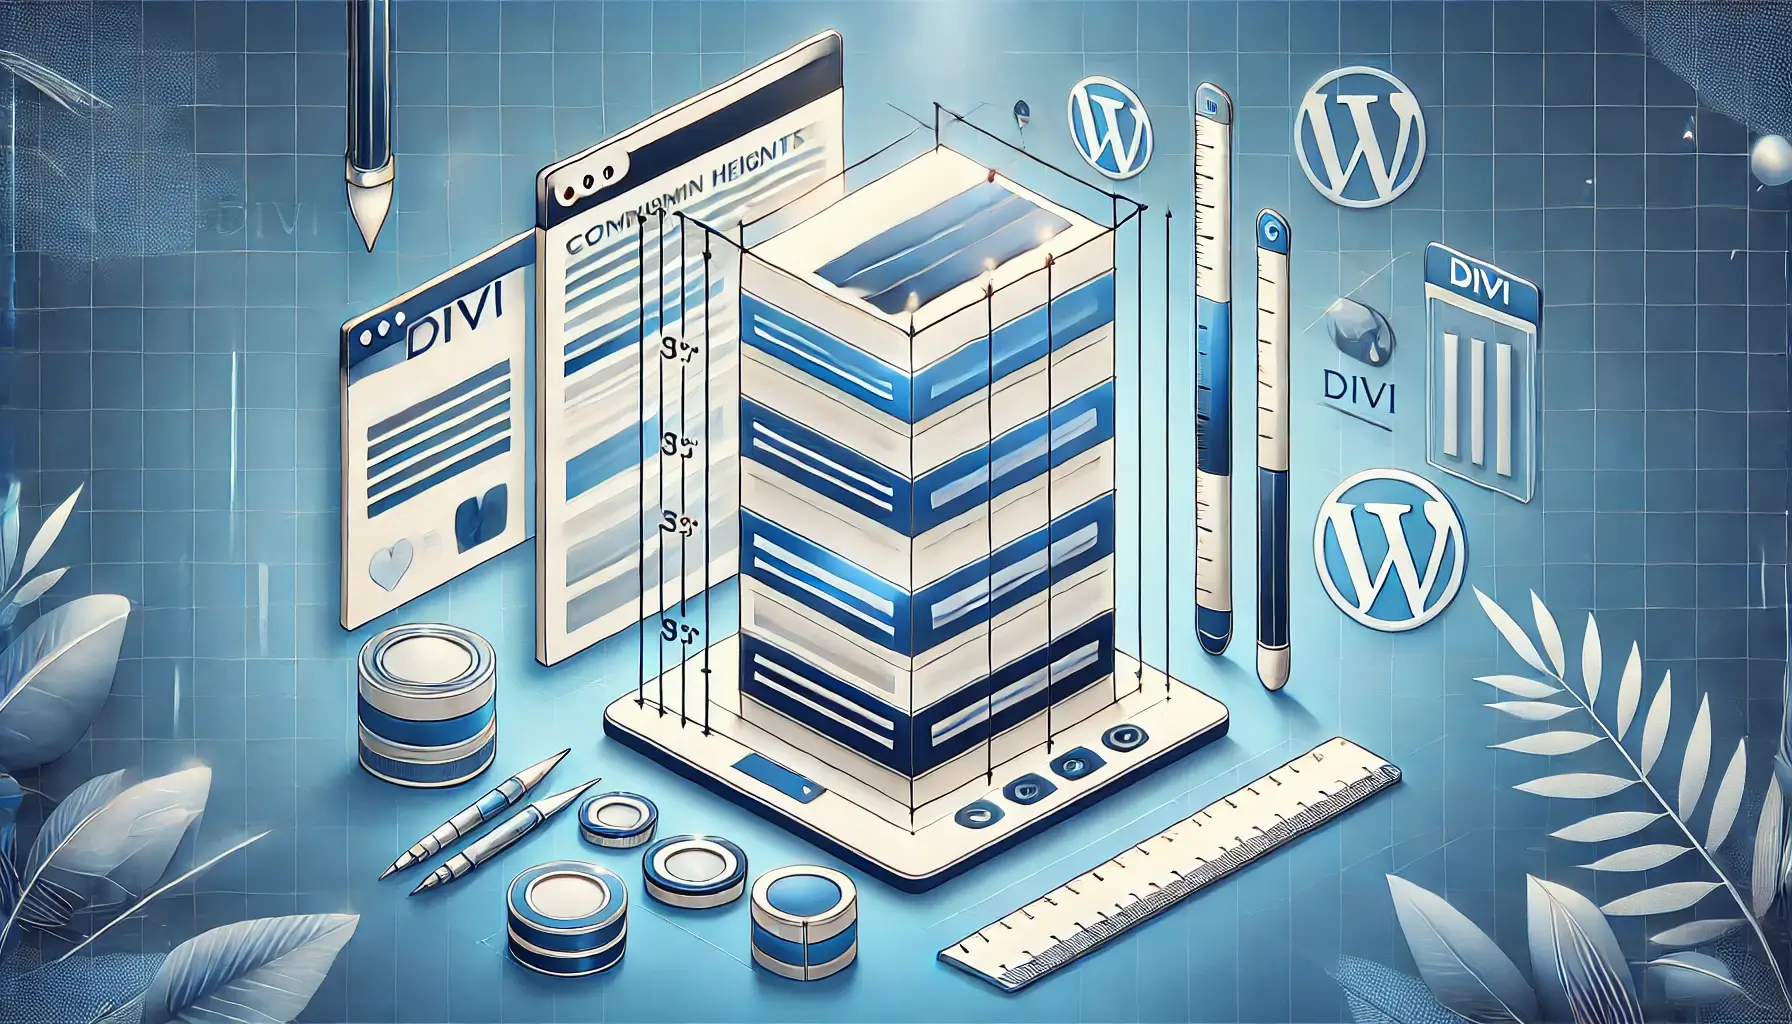
How to Equalize Divi Theme Column Heights

How to Equalize Divi Theme Column Heights

Divi is a popular and powerful WordPress theme that offers a wide range of customization options for building stunning websites. However, one common issue that many Divi users encounter is uneven column heights, which can lead to an unattractive and unprofessional appearance. In this guide, we’ll walk you through several methods to equalize Divi theme column heights, ensuring a consistent and visually appealing layout for your website.

  • Using the Equalize Column Heights Feature: Divi comes with a built-in feature to equalize column heights automatically. When you’re working with a row in the Divi Builder, click on the row settings (gear icon) and navigate to the “Design” tab. Here, you’ll find the “Equalize Column Heights” option. Enable it, and Divi will ensure that all columns within the row have the same height, adjusting them to match the tallest column’s height. This is the simplest and quickest way to achieve equal column heights.
  • Utilizing Custom CSS: If the built-in feature doesn’t work as expected due to complex customizations or third-party plugins, you can use custom CSS to equalize the column heights. To do this, access the row or module settings and click on the “Advanced” tab. Find the “Custom CSS” box and insert the following code:

How to Equalize Divi Theme Column Heights

 /* Equalize column heights */
.et_pb_row{
  display: flex;
  flex-wrap: wrap;
}

.et_pb_column{
  display: flex;
}
.et_pb_column.et_pb_column_1_2{
  flex: 1;
}

This CSS code will force the columns within the row to display as a flex container, making them adjust their height automatically to match the tallest column. Remember to save your changes after adding the custom CSS.

  • Employing JavaScript Solutions: For more complex layouts or scenarios where CSS alone doesn’t suffice, JavaScript can be a viable solution. Numerous JavaScript libraries, such as “Equalizer” or “MatchHeight,” can be integrated into your Divi theme. These libraries will dynamically equalize the heights of columns on page load and when the content changes. To utilize this approach, you’ll need to enqueue the JavaScript library correctly, either through your theme’s functions.php file or via a custom plugin.
  • Adjusting Content and Images: Sometimes, uneven column heights can be caused by varying amounts of content or different image sizes within the columns. Ensure that your content and images are consistent across columns to prevent any discrepancies. If necessary, adjust the content or use image cropping to create uniformity.

Equalizing column heights is essential to maintain a polished and harmonious appearance for your Divi-based website. Whether you choose to utilize Divi’s built-in feature, custom CSS, or JavaScript solutions, each method offers a way to tackle this common issue effectively. By following the methods outlined in this guide, you can ensure that your Divi theme columns look visually appealing, creating a seamless and professional user experience for your website visitors.